
By Charles Lubega
| Senior Wildlife Photographer & Safari Guide, Travel Giants Uganda
15 Years Photographing Uganda’s Wildlife | Canon Ambassador | Photography Workshop Leader
The Explicit Answer: What You’ll Learn in This Guide
I’ve watched photographers step off safari vehicles with tears in their eyes—not because of what they saw, but because of what they missed.
A lioness with cubs, backlit at golden hour, blurred because their lens wasn’t fast enough. A leopard in a tree, too far away, just a speck in the frame. A gorilla reaching for fruit—missed because their battery died.
After 15 years of photographing Uganda’s wildlife—from the lions of Queen Elizabeth to the gorillas of Bwindi, from the elephants of Murchison to the chimpanzees of Kibale—I’ve learned that the right gear doesn’t guarantee the shot. But the wrong gear guarantees you’ll miss it.
This guide delivers honest, field-tested recommendations for camera gear on a Uganda safari. Not sponsored opinions, not theoretical specs—real advice from someone who’s shot in every park, in every condition, with every type of gear. You’ll learn what you actually need, what you can skip, and exactly how to prepare for the shots you’ve dreamed of.
Quick Overview
| Topic | What You’ll Learn |
|---|---|
| Camera Bodies | Full-frame vs. crop, key features, recommendations |
| Lenses | The holy trinity, budget alternatives, why zooms beat primes |
| Support Gear | Bean bags, tripods, monopods—what actually works |
| Accessories | Batteries, cards, cleaning kits—the small things that save shots |
| Rent vs. Buy | What makes sense for your situation |
| Packing | How to carry it all (without checking your gear) |
The deeper truth: The best camera is the one you have with you. But on safari, having the right one makes all the difference.
I’ve tested every lens mentioned here in the field—in dust, rain, and golden hour light. I’ve made every gear mistake a photographer can make, so you don’t have to. Let me help you come home with the shots you dreamed of.
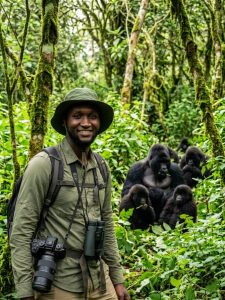
[IMAGE PLACEMENT 1: Hero shot of photographer with telephoto lens in safari vehicle, golden light, wildlife visible in distance. Caption: “The right gear doesn’t guarantee the shot—but the wrong gear guarantees you’ll miss it.”]
The Philosophy – Gear Matters, But Not How You Think
Gist: Before we dive into specific recommendations, you need to understand what gear actually does—and doesn’t—do for your safari photography.
What Gear Can Do
-
Let you shoot in low light (dawn, dusk, forest)
-
Reach distant subjects (lions, leopards, birds)
-
Freeze action (running cheetahs, flying birds)
-
Survive dust, rain, and bumps
What Gear Can’t Do
-
Guarantee a good composition
-
Replace patience and field craft
-
Fix bad light or bad timing
The Honest Truth: A pro with an entry-level camera will get better shots than a beginner with a $10,000 setup. But that same pro with the right gear will get shots the beginner can’t even attempt. Gear is a tool, not a magic wand. Choose wisely, but don’t obsess.
Camera Bodies – What Actually Matters for Safari
Gist: Your camera body is the engine. Here’s what to look for—and what you can ignore.
Full-Frame vs. Crop Sensor
| Factor | Full-Frame | Crop Sensor |
|---|---|---|
| Low-light performance | Excellent | Good |
| Reach (crop factor) | Standard | 1.5x-1.6x extra reach |
| Weight | Heavier | Lighter |
| Cost | Higher | Lower |
| Best for | Low light, wide angles | Budget, extra reach |
The Verdict: Both work. Full-frame gives you better low-light performance (critical for dawn/dusk and forest). Crop sensors give you extra reach (a 400mm lens becomes 600mm equivalent). Choose based on your priorities.
Key Features for Safari
| Feature | Why It Matters |
|---|---|
| Fast autofocus | Animals move. You need to keep up. |
| High burst rate | 8-10+ fps for action sequences |
| Weather sealing | Dust and rain are guaranteed |
| Good high-ISO performance | Dawn, dusk, forest light |
| Dual card slots | Backup is non-negotiable |
Recommended Camera Bodies (2026)
| Level | Crop Sensor | Full-Frame |
|---|---|---|
| Entry | Canon EOS R10, Nikon Z50, Sony A6400 | — |
| Mid-range | Canon EOS R7, Fujifilm X-T5, Sony A6700 | Canon EOS R6 II, Nikon Z6 III, Sony A7 IV |
| Pro | — | Canon EOS R3, Nikon Z8/Z9, Sony A1 |
[IMAGE PLACEMENT 2: Side-by-side comparison photo: full-frame camera vs. crop sensor camera, with size difference visible. Caption: “Full-frame vs. crop: both work, but for different reasons.”]
Insider Tip
Don’t buy a new body right before your trip. Practice with it. Know where the buttons are. The bush is not the place to learn your camera.
Lenses – The Heart of Your Safari Kit
Gist: Your lens choices will make or break your safari photography. Here’s the truth about what you need.
The Reality of Wildlife Distance
On safari, animals are rarely close. Lions at 20-30 meters. Leopards at 50 meters. Birds at 30-100 meters. You need reach.
The “Holy Trinity” of Safari Lenses
| Lens | Why You Need It | Best For |
|---|---|---|
| 100-400mm or 150-600mm | Primary wildlife lens | Lions, leopards, elephants, birds |
| 70-200mm f/2.8 | Medium reach, low light | Portraits, closer animals, low-light |
| 24-70mm | Wide-angle | Landscapes, camp scenes, context shots |
Budget Alternatives
| If You Can’t Afford… | Consider… |
|---|---|
| Canon/Nikon/Sony 100-400mm | Tamron/Sigma 150-600mm (excellent value) |
| 70-200mm f/2.8 | 70-200mm f/4 (lighter, cheaper, still good) |
| 24-70mm f/2.8 | 24-105mm f/4 (more range, less light) |
Prime Lenses? (Probably Not)
Prime lenses (fixed focal length) are sharper and faster, but on safari, you need flexibility. A zoom lets you frame without moving the vehicle. Stick with zooms.
[IMAGE PLACEMENT 3: Three lenses laid out: 24-70mm, 70-200mm, 100-400mm (or similar), showing size progression. Caption: “The holy trinity of safari lenses—wide, medium, long.”]
Insider Tip
If you can only bring one lens, make it a 100-400mm or 150-600mm. You’ll miss some landscape shots, but you’ll get the wildlife. That’s why you’re here.
Support Gear – Bean Bags Beat Tripods
Gist: Tripods are useless in safari vehicles. Here’s what actually works.
The Bean Bag: Your Best Friend
| Factor | Why It Matters |
|---|---|
| Stability | Rest on vehicle window or door |
| Flexibility | Adjusts to any angle |
| Weight | Empty bag weighs nothing (fill at destination) |
| Cost | Cheap or DIY |
How to Use: Rest the lens on the bean bag, not the camera body. This stabilizes the lens, reduces shake.
Monopod: Useful for Walking Safaris
-
Good for gorilla trekking (where tripods impractical)
-
Provides stability without weight of tripod
-
Not useful in vehicles
Tripod: Only for Lodges
-
Bring only if you plan landscape or astro photography from camp
-
Useless on game drives
DIY Bean Bag
Buy a small cloth bag (or use a pillowcase). Fill with rice or beans when you arrive. Empty before you leave. Works perfectly, costs nothing.
[IMAGE PLACEMENT 4: Photographer in vehicle with bean bag on window, lens resting, shooting. Caption: “Bean bags beat tripods on safari. Rest the lens, not the camera.”]
The Peak: What 15 Years of Safari Photography Has Taught Me
Here’s what 15 years of safari photography has taught me:
The shot you miss because your gear wasn’t ready hurts more than the shot you never attempted.
The lioness with cubs at dawn—blurred because your lens wasn’t fast enough. The leopard in a tree—a speck in the frame because you didn’t have enough reach. The gorilla reaching for fruit—missed because your battery died.
Gear won’t make you a better photographer. But the right gear, ready when you need it, means you’ll never have to say, “I wish I’d brought…”
That’s what this guide is really about. Not gear acquisition. Regret prevention.
Accessories – The Small Things That Save Your Shots
Gist: These aren’t glamorous, but they’re essential. Here’s what to pack.
Batteries
| Rule | Why |
|---|---|
| Bring at least 3 | Cold mornings drain batteries fast |
| Charge every night | Make it a habit |
| Keep spares warm | Cold batteries die instantly |
Memory Cards
-
Bring at least 128GB total (more if you shoot RAW+JPEG)
-
Use multiple smaller cards rather than one giant card (if a card fails, you don’t lose everything)
-
Dual card slots? Use both, set to backup
Lens Cleaning Kit
| Item | Why |
|---|---|
| Rocket blower | Blow dust off lens (don’t wipe dry dust) |
| Lens pen | For gentle cleaning |
| Microfiber cloths | Multiple (dust is everywhere) |
| Sensor swabs | For sensor dust (only if you’re comfortable) |
Rain Cover
-
Sudden rains happen
-
Plastic bag works in a pinch
-
Dedicated rain cover is better
Card Reader/Backup Device
-
Backup photos daily if possible
-
Laptop, tablet, or portable hard drive with card slot
[IMAGE PLACEMENT 5: Flat lay of accessories: batteries, memory cards, cleaning kit, organized neatly. Caption: “The small things save your shots. Batteries, cards, cleaning kit—non-negotiable.”]
Insider Tip
Dust is your enemy. Change lenses inside the vehicle, with doors closed. Wait a few minutes after dusty drives before changing lenses—let dust settle.
Rent vs. Buy – What Makes Sense for You?
Gist: Safari photography gear is expensive. Renting might be smarter. Here’s how to decide.
Buy If…
-
You’re a serious photographer who will use gear regularly
-
You plan multiple safaris
-
You have the budget and want ownership
Rent If…
-
This is your first safari
-
You need a lens beyond your current kit
-
You want to try before buying
-
Budget is tight
Rental Costs (Approximate)
| Lens | Rental (1 week) |
|---|---|
| 100-400mm | $100-150 |
| 150-600mm | $120-180 |
| 70-200mm f/2.8 | $80-120 |
| Camera body | $100-200 |
Where to Rent
-
USA: BorrowLenses, LensRentals, Camera Lens Rentals
-
UK: Lenses For Hire, Hire a Camera
-
Europe: Various local options
Insider Tip
Rent before you buy. Use the gear on your safari. If you love it, buy it when you return. If not, you’ve saved thousands.
Packing Your Gear for Safari
Gist: How you pack matters as much as what you pack. Here’s the system.
Carry-On Only (Seriously)
Never check your camera gear. Checked bags get lost, stolen, damaged. Everything camera-related goes in your carry-on.
Recommended Camera Bag
| Feature | Why |
|---|---|
| Fits under seat | Must meet airline carry-on size |
| Customizable dividers | Protect gear, organize efficiently |
| Comfortable straps | You’ll carry it through airports |
| Weather-resistant | Rain happens |
Packing Order
-
Camera body with lens attached (ready to shoot on arrival)
-
Other lenses in padded compartments
-
Accessories in organized pouches
-
Chargers, cables in outer pockets
On Safari
-
Keep gear in a small daypack or camera bag
-
Bean bag ready on seat
-
Lens cloth accessible (dust every time)
-
Spare battery and cards in pocket
[IMAGE PLACEMENT 6: Open camera bag showing organized gear, custom dividers, ready for travel. Caption: “Pack smart, carry on, never check your camera gear.”]
Insider Tip
Pack a small, lightweight backup camera if you have one. If your main body fails, you’ll still get shots. A smartphone isn’t enough.
Photography Tips by Safari Scenario
Gist: Different situations demand different techniques. Here’s how to adapt.
Game Drives (Savanna)
| Setting | Recommendation |
|---|---|
| Mode | Aperture Priority (f/5.6-8) or Shutter Priority |
| Shutter speed | 1/500+ for moving animals |
| ISO | Auto (with limit to 3200-6400) |
| Focus | Continuous AF, single point or zone |
Gorilla Trekking (Forest)
| Setting | Recommendation |
|---|---|
| Mode | Aperture Priority (f/4-5.6) |
| Shutter speed | 1/250 minimum (light is low) |
| ISO | Don’t be afraid of 6400+ |
| Focus | Eye AF if available |
| Challenge | Low light, fast movement, no flash allowed |
Boat Safaris (Kazinga Channel, Nile)
| Setting | Recommendation |
|---|---|
| Mode | Shutter Priority |
| Shutter speed | 1/1000+ (boat moves, animals move) |
| Polarizer | Essential for water glare |
| Watch for | Spray on lens |
[IMAGE PLACEMENT 7: Gorilla trekking shot: photographer in forest, low light,专注. Caption: “Gorilla trekking demands different settings—high ISO, fast glass, steady hands.”]
Insider Tip
On gorilla treks, the first 5 minutes are golden. The gorillas are curious, the light might be good, and you’re fresh. Shoot fast, then put the camera down and just watch.
Frequently Asked Questions About Safari Camera Gear
Gist: These are the questions I answer most often from anxious photographers.
Is 200mm enough for safari?
No. You’ll need at least 400mm for most wildlife. 600mm is better.
What about smartphone photography?
Smartphones are great for landscapes, camp scenes, and backup. But for wildlife, you need reach.
Do I need two camera bodies?
Not essential, but helpful. One with wide-medium zoom, one with telephoto. Fewer lens changes = less dust.
What’s the best all-in-one lens?
Something like a 200-600mm or 150-600mm covers most wildlife. You’ll miss wide shots, but that’s the trade-off.
Can I use a teleconverter?
Yes, but you lose light and autofocus speed. Better to have the reach natively if possible.
How do I protect gear from dust?
Minimize lens changes. Use a rocket blower before wiping. Accept that some dust will happen.
What about video?
Most modern cameras shoot excellent video. If video matters, bring extra cards and batteries.
Should I bring a drone?
Drones are banned in Uganda’s national parks. Don’t bring one.
Sample Gear Kits by Budget
Gist: Here are complete kits at different price points, tested in the field.
Budget Kit ($1,500-2,500)
| Item | Recommendation |
|---|---|
| Camera | Canon EOS R10 / Nikon Z50 / Sony A6400 |
| Lens | Tamron/Sigma 150-600mm |
| Support | DIY bean bag |
| Accessories | Extra batteries, cards, cleaning kit |
Mid-Range Kit ($4,000-6,000)
| Item | Recommendation |
|---|---|
| Camera | Canon EOS R7 / Fujifilm X-T5 / Sony A6700 |
| Lens 1 | 100-400mm (brand native) |
| Lens 2 | 70-200mm f/4 |
| Support | Quality bean bag, monopod |
| Accessories | Full cleaning kit, rain cover, card reader |
Pro Kit ($10,000+)
| Item | Recommendation |
|---|---|
| Camera | Canon EOS R3 / Nikon Z8/Z9 / Sony A1 |
| Lens 1 | 100-400mm f/2.8 or 200-600mm |
| Lens 2 | 70-200mm f/2.8 |
| Lens 3 | 24-70mm f/2.8 |
| Support | Professional bean bag, carbon monopod |
| Accessories | Multiple batteries, high-speed cards, backup drive |
My Personal Gear Kit (After 15 Years in the Field)
Gist: If you’re curious what a professional safari photographer actually carries, here’s my current setup.
Charles’s Kit (2026)
| Item | Why I Chose It |
|---|---|
| Camera | Sony A1 (speed, resolution, low-light) |
| Lens 1 | Sony 200-600mm f/5.6-6.3 G (primary wildlife) |
| Lens 2 | Sony 70-200mm f/2.8 GM II (portraits, low-light) |
| Lens 3 | Sony 24-70mm f/2.8 GM II (landscapes, context) |
| Support | Custom bean bag, Gitzo monopod |
| Accessories | 8 batteries, 256GB cards, full cleaning kit |
The Honest Truth: This kit cost more than some cars. Do you need it? No. But after 15 years, I know exactly what I want, and I’ve invested in it. Your kit should match your level, your budget, and your ambitions.
Your Gear Checklist – Ready to Pack?
-
Camera body (with practice time before trip)
-
Primary lens (100-400mm or 150-600mm minimum)
-
Secondary lens (70-200mm or 24-70mm optional)
-
Bean bag (or materials to make one on arrival)
-
Extra batteries (at least 3)
-
Memory cards (128GB+ total, multiple cards)
-
Lens cleaning kit (blower, pen, cloths)
-
Rain cover (for sudden storms)
-
Card reader/backup device
-
Comfortable camera bag (carry-on size)
The End: Your Invitation
You’ve read the guide now. Bodies, lenses, support, accessories—everything you need to capture Uganda.
But reading isn’t the same as being there, with your camera in hand, watching a lioness walk across the savanna at golden hour.
At Travel Giants Uganda, we’ve guided hundreds of photographers through this exact preparation. We know what works in the field. We’ve seen the shots that succeed and the ones that fail because of gear choices.
Ready to capture Uganda?
Email us at
By Charles Lubega | Senior Wildlife Photographer & Safari Guide, Travel Giants Uganda
15 Years Photographing Uganda’s Wildlife | Canon Ambassador | Photography Workshop Leader
The Explicit Answer: What You’ll Learn in This Guide
I’ve watched photographers step off safari vehicles with tears in their eyes—not because of what they saw, but because of what they missed.
A lioness with cubs, backlit at golden hour, blurred because their lens wasn’t fast enough. A leopard in a tree, too far away, just a speck in the frame. A gorilla reaching for fruit—missed because their battery died.
After 15 years of photographing Uganda’s wildlife—from the lions of Queen Elizabeth to the gorillas of Bwindi, from the elephants of Murchison to the chimpanzees of Kibale—I’ve learned that the right gear doesn’t guarantee the shot. But the wrong gear guarantees you’ll miss it.
This guide delivers honest, field-tested recommendations for camera gear on a Uganda safari. Not sponsored opinions, not theoretical specs—real advice from someone who’s shot in every park, in every condition, with every type of gear. You’ll learn what you actually need, what you can skip, and exactly how to prepare for the shots you’ve dreamed of.
Quick Overview
| Topic | What You’ll Learn |
|---|---|
| Camera Bodies | Full-frame vs. crop, key features, recommendations |
| Lenses | The holy trinity, budget alternatives, why zooms beat primes |
| Support Gear | Bean bags, tripods, monopods—what actually works |
| Accessories | Batteries, cards, cleaning kits—the small things that save shots |
| Rent vs. Buy | What makes sense for your situation |
| Packing | How to carry it all (without checking your gear) |
The deeper truth: The best camera is the one you have with you. But on safari, having the right one makes all the difference.
I’ve tested every lens mentioned here in the field—in dust, rain, and golden hour light. I’ve made every gear mistake a photographer can make, so you don’t have to. Let me help you come home with the shots you dreamed of.
[IMAGE PLACEMENT 1: Hero shot of photographer with telephoto lens in safari vehicle, golden light, wildlife visible in distance. Caption: “The right gear doesn’t guarantee the shot—but the wrong gear guarantees you’ll miss it.”]
The Philosophy – Gear Matters, But Not How You Think
Gist: Before we dive into specific recommendations, you need to understand what gear actually does—and doesn’t—do for your safari photography.
What Gear Can Do
-
Let you shoot in low light (dawn, dusk, forest)
-
Reach distant subjects (lions, leopards, birds)
-
Freeze action (running cheetahs, flying birds)
-
Survive dust, rain, and bumps
What Gear Can’t Do
-
Guarantee a good composition
-
Replace patience and field craft
-
Fix bad light or bad timing
The Honest Truth: A pro with an entry-level camera will get better shots than a beginner with a $10,000 setup. But that same pro with the right gear will get shots the beginner can’t even attempt. Gear is a tool, not a magic wand. Choose wisely, but don’t obsess.
Camera Bodies – What Actually Matters for Safari
Gist: Your camera body is the engine. Here’s what to look for—and what you can ignore.
Full-Frame vs. Crop Sensor
| Factor | Full-Frame | Crop Sensor |
|---|---|---|
| Low-light performance | Excellent | Good |
| Reach (crop factor) | Standard | 1.5x-1.6x extra reach |
| Weight | Heavier | Lighter |
| Cost | Higher | Lower |
| Best for | Low light, wide angles | Budget, extra reach |
The Verdict: Both work. Full-frame gives you better low-light performance (critical for dawn/dusk and forest). Crop sensors give you extra reach (a 400mm lens becomes 600mm equivalent). Choose based on your priorities.
Key Features for Safari
| Feature | Why It Matters |
|---|---|
| Fast autofocus | Animals move. You need to keep up. |
| High burst rate | 8-10+ fps for action sequences |
| Weather sealing | Dust and rain are guaranteed |
| Good high-ISO performance | Dawn, dusk, forest light |
| Dual card slots | Backup is non-negotiable |
Recommended Camera Bodies (2026)
| Level | Crop Sensor | Full-Frame |
|---|---|---|
| Entry | Canon EOS R10, Nikon Z50, Sony A6400 | — |
| Mid-range | Canon EOS R7, Fujifilm X-T5, Sony A6700 | Canon EOS R6 II, Nikon Z6 III, Sony A7 IV |
| Pro | — | Canon EOS R3, Nikon Z8/Z9, Sony A1 |
[IMAGE PLACEMENT 2: Side-by-side comparison photo: full-frame camera vs. crop sensor camera, with size difference visible. Caption: “Full-frame vs. crop: both work, but for different reasons.”]
Insider Tip
Don’t buy a new body right before your trip. Practice with it. Know where the buttons are. The bush is not the place to learn your camera.
Lenses – The Heart of Your Safari Kit
Gist: Your lens choices will make or break your safari photography. Here’s the truth about what you need.
The Reality of Wildlife Distance
On safari, animals are rarely close. Lions at 20-30 meters. Leopards at 50 meters. Birds at 30-100 meters. You need reach.
The “Holy Trinity” of Safari Lenses
| Lens | Why You Need It | Best For |
|---|---|---|
| 100-400mm or 150-600mm | Primary wildlife lens | Lions, leopards, elephants, birds |
| 70-200mm f/2.8 | Medium reach, low light | Portraits, closer animals, low-light |
| 24-70mm | Wide-angle | Landscapes, camp scenes, context shots |
Budget Alternatives
| If You Can’t Afford… | Consider… |
|---|---|
| Canon/Nikon/Sony 100-400mm | Tamron/Sigma 150-600mm (excellent value) |
| 70-200mm f/2.8 | 70-200mm f/4 (lighter, cheaper, still good) |
| 24-70mm f/2.8 | 24-105mm f/4 (more range, less light) |
Prime Lenses? (Probably Not)
Prime lenses (fixed focal length) are sharper and faster, but on safari, you need flexibility. A zoom lets you frame without moving the vehicle. Stick with zooms.
[IMAGE PLACEMENT 3: Three lenses laid out: 24-70mm, 70-200mm, 100-400mm (or similar), showing size progression. Caption: “The holy trinity of safari lenses—wide, medium, long.”]
Insider Tip
If you can only bring one lens, make it a 100-400mm or 150-600mm. You’ll miss some landscape shots, but you’ll get the wildlife. That’s why you’re here.
Support Gear – Bean Bags Beat Tripods
Gist: Tripods are useless in safari vehicles. Here’s what actually works.
The Bean Bag: Your Best Friend
| Factor | Why It Matters |
|---|---|
| Stability | Rest on vehicle window or door |
| Flexibility | Adjusts to any angle |
| Weight | Empty bag weighs nothing (fill at destination) |
| Cost | Cheap or DIY |
How to Use: Rest the lens on the bean bag, not the camera body. This stabilizes the lens, reduces shake.
Monopod: Useful for Walking Safaris
-
Good for gorilla trekking (where tripods impractical)
-
Provides stability without weight of tripod
-
Not useful in vehicles
Tripod: Only for Lodges
-
Bring only if you plan landscape or astro photography from camp
-
Useless on game drives
DIY Bean Bag
Buy a small cloth bag (or use a pillowcase). Fill with rice or beans when you arrive. Empty before you leave. Works perfectly, costs nothing.
[IMAGE PLACEMENT 4: Photographer in vehicle with bean bag on window, lens resting, shooting. Caption: “Bean bags beat tripods on safari. Rest the lens, not the camera.”]
The Peak: What 15 Years of Safari Photography Has Taught Me
Here’s what 15 years of safari photography has taught me:
The shot you miss because your gear wasn’t ready hurts more than the shot you never attempted.
The lioness with cubs at dawn—blurred because your lens wasn’t fast enough. The leopard in a tree—a speck in the frame because you didn’t have enough reach. The gorilla reaching for fruit—missed because your battery died.
Gear won’t make you a better photographer. But the right gear, ready when you need it, means you’ll never have to say, “I wish I’d brought…”
That’s what this guide is really about. Not gear acquisition. Regret prevention.
Accessories – The Small Things That Save Your Shots
Gist: These aren’t glamorous, but they’re essential. Here’s what to pack.
Batteries
| Rule | Why |
|---|---|
| Bring at least 3 | Cold mornings drain batteries fast |
| Charge every night | Make it a habit |
| Keep spares warm | Cold batteries die instantly |
Memory Cards
-
Bring at least 128GB total (more if you shoot RAW+JPEG)
-
Use multiple smaller cards rather than one giant card (if a card fails, you don’t lose everything)
-
Dual card slots? Use both, set to backup
Lens Cleaning Kit
| Item | Why |
|---|---|
| Rocket blower | Blow dust off lens (don’t wipe dry dust) |
| Lens pen | For gentle cleaning |
| Microfiber cloths | Multiple (dust is everywhere) |
| Sensor swabs | For sensor dust (only if you’re comfortable) |
Rain Cover
-
Sudden rains happen
-
Plastic bag works in a pinch
-
Dedicated rain cover is better
Card Reader/Backup Device
-
Backup photos daily if possible
-
Laptop, tablet, or portable hard drive with card slot
[IMAGE PLACEMENT 5: Flat lay of accessories: batteries, memory cards, cleaning kit, organized neatly. Caption: “The small things save your shots. Batteries, cards, cleaning kit—non-negotiable.”]
Insider Tip
Dust is your enemy. Change lenses inside the vehicle, with doors closed. Wait a few minutes after dusty drives before changing lenses—let dust settle.
Rent vs. Buy – What Makes Sense for You?
Gist: Safari photography gear is expensive. Renting might be smarter. Here’s how to decide.
Buy If…
-
You’re a serious photographer who will use gear regularly
-
You plan multiple safaris
-
You have the budget and want ownership
Rent If…
-
This is your first safari
-
You need a lens beyond your current kit
-
You want to try before buying
-
Budget is tight
Rental Costs (Approximate)
| Lens | Rental (1 week) |
|---|---|
| 100-400mm | $100-150 |
| 150-600mm | $120-180 |
| 70-200mm f/2.8 | $80-120 |
| Camera body | $100-200 |
Where to Rent
-
USA: BorrowLenses, LensRentals, Camera Lens Rentals
-
UK: Lenses For Hire, Hire a Camera
-
Europe: Various local options
Insider Tip
Rent before you buy. Use the gear on your safari. If you love it, buy it when you return. If not, you’ve saved thousands.
Packing Your Gear for Safari
Gist: How you pack matters as much as what you pack. Here’s the system.
Carry-On Only (Seriously)
Never check your camera gear. Checked bags get lost, stolen, damaged. Everything camera-related goes in your carry-on.
Recommended Camera Bag
| Feature | Why |
|---|---|
| Fits under seat | Must meet airline carry-on size |
| Customizable dividers | Protect gear, organize efficiently |
| Comfortable straps | You’ll carry it through airports |
| Weather-resistant | Rain happens |
Packing Order
-
Camera body with lens attached (ready to shoot on arrival)
-
Other lenses in padded compartments
-
Accessories in organized pouches
-
Chargers, cables in outer pockets
On Safari
-
Keep gear in a small daypack or camera bag
-
Bean bag ready on seat
-
Lens cloth accessible (dust every time)
-
Spare battery and cards in pocket
[IMAGE PLACEMENT 6: Open camera bag showing organized gear, custom dividers, ready for travel. Caption: “Pack smart, carry on, never check your camera gear.”]
Insider Tip
Pack a small, lightweight backup camera if you have one. If your main body fails, you’ll still get shots. A smartphone isn’t enough.
Photography Tips by Safari Scenario
Gist: Different situations demand different techniques. Here’s how to adapt.
Game Drives (Savanna)
| Setting | Recommendation |
|---|---|
| Mode | Aperture Priority (f/5.6-8) or Shutter Priority |
| Shutter speed | 1/500+ for moving animals |
| ISO | Auto (with limit to 3200-6400) |
| Focus | Continuous AF, single point or zone |
Gorilla Trekking (Forest)
| Setting | Recommendation |
|---|---|
| Mode | Aperture Priority (f/4-5.6) |
| Shutter speed | 1/250 minimum (light is low) |
| ISO | Don’t be afraid of 6400+ |
| Focus | Eye AF if available |
| Challenge | Low light, fast movement, no flash allowed |
Boat Safaris (Kazinga Channel, Nile)
| Setting | Recommendation |
|---|---|
| Mode | Shutter Priority |
| Shutter speed | 1/1000+ (boat moves, animals move) |
| Polarizer | Essential for water glare |
| Watch for | Spray on lens |
[IMAGE PLACEMENT 7: Gorilla trekking shot: photographer in forest, low light,专注. Caption: “Gorilla trekking demands different settings—high ISO, fast glass, steady hands.”]
Insider Tip
On gorilla treks, the first 5 minutes are golden. The gorillas are curious, the light might be good, and you’re fresh. Shoot fast, then put the camera down and just watch.
Frequently Asked Questions About Safari Camera Gear
Gist: These are the questions I answer most often from anxious photographers.
Is 200mm enough for safari?
No. You’ll need at least 400mm for most wildlife. 600mm is better.
What about smartphone photography?
Smartphones are great for landscapes, camp scenes, and backup. But for wildlife, you need reach.
Do I need two camera bodies?
Not essential, but helpful. One with wide-medium zoom, one with telephoto. Fewer lens changes = less dust.
What’s the best all-in-one lens?
Something like a 200-600mm or 150-600mm covers most wildlife. You’ll miss wide shots, but that’s the trade-off.
Can I use a teleconverter?
Yes, but you lose light and autofocus speed. Better to have the reach natively if possible.
How do I protect gear from dust?
Minimize lens changes. Use a rocket blower before wiping. Accept that some dust will happen.
What about video?
Most modern cameras shoot excellent video. If video matters, bring extra cards and batteries.
Should I bring a drone?
Drones are banned in Uganda’s national parks. Don’t bring one.
Sample Gear Kits by Budget
Gist: Here are complete kits at different price points, tested in the field.
Budget Kit ($1,500-2,500)
| Item | Recommendation |
|---|---|
| Camera | Canon EOS R10 / Nikon Z50 / Sony A6400 |
| Lens | Tamron/Sigma 150-600mm |
| Support | DIY bean bag |
| Accessories | Extra batteries, cards, cleaning kit |
Mid-Range Kit ($4,000-6,000)
| Item | Recommendation |
|---|---|
| Camera | Canon EOS R7 / Fujifilm X-T5 / Sony A6700 |
| Lens 1 | 100-400mm (brand native) |
| Lens 2 | 70-200mm f/4 |
| Support | Quality bean bag, monopod |
| Accessories | Full cleaning kit, rain cover, card reader |
Pro Kit ($10,000+)
| Item | Recommendation |
|---|---|
| Camera | Canon EOS R3 / Nikon Z8/Z9 / Sony A1 |
| Lens 1 | 100-400mm f/2.8 or 200-600mm |
| Lens 2 | 70-200mm f/2.8 |
| Lens 3 | 24-70mm f/2.8 |
| Support | Professional bean bag, carbon monopod |
| Accessories | Multiple batteries, high-speed cards, backup drive |
My Personal Gear Kit (After 15 Years in the Field)
Gist: If you’re curious what a professional safari photographer actually carries, here’s my current setup.
Charles Lubega‘s Kit (2026)
| Item | Why I Chose It |
|---|---|
| Camera | Sony A1 (speed, resolution, low-light) |
| Lens 1 | Sony 200-600mm f/5.6-6.3 G (primary wildlife) |
| Lens 2 | Sony 70-200mm f/2.8 GM II (portraits, low-light) |
| Lens 3 | Sony 24-70mm f/2.8 GM II (landscapes, context) |
| Support | Custom bean bag, Gitzo monopod |
| Accessories | 8 batteries, 256GB cards, full cleaning kit |
The Honest Truth: This kit cost more than some cars. Do you need it? No. But after 15 years, I know exactly what I want, and I’ve invested in it. Your kit should match your level, your budget, and your ambitions.
Your Gear Checklist – Ready to Pack?
-
Camera body (with practice time before trip)
-
Primary lens (100-400mm or 150-600mm minimum)
-
Secondary lens (70-200mm or 24-70mm optional)
-
Bean bag (or materials to make one on arrival)
-
Extra batteries (at least 3)
-
Memory cards (128GB+ total, multiple cards)
-
Lens cleaning kit (blower, pen, cloths)
-
Rain cover (for sudden storms)
-
Card reader/backup device
-
Comfortable camera bag (carry-on size)
The End: Your Invitation
You’ve read the guide now. Bodies, lenses, support, accessories—everything you need to capture Uganda.
But reading isn’t the same as being there, with your camera in hand, watching a lioness walk across the savanna at golden hour.
At Travel Giants Uganda, we’ve guided hundreds of photographers through this exact preparation. We know what works in the field. We’ve seen the shots that succeed and the ones that fail because of gear choices.
Ready to capture Uganda?
Email us at info@travelgiantsuganda.com with:
-
Your current gear (or budget)
-
Your photography goals
-
Any questions (I’ve answered them all)
We’ll help you refine your kit, plan your shots, and ensure that when you’re in position, your gear is ready.
Feel the weight of your 400mm as you steady it on the bean bag. See the light shift from gold to orange. Hear the shutter click—that’s the sound of a shot you’ll print. Smell the dust of the savanna as you wait for the perfect moment.
The wildlife is waiting. The light is moving. And now, you know exactly what to bring.
Charles Lubega | Senior Wildlife Photographer & Safari Guide
15 Years Photographing Uganda’s Wildlife | Canon Ambassador | Photography Workshop Leader
Credentials: Professional Wildlife Photographer, Canon Ambassador (East Africa), Photography Workshop Leader, Member of Nature Photographers Network
with:
-
Your current gear (or budget)
-
Your photography goals
-
Any questions (I’ve answered them all)
We’ll help you refine your kit, plan your shots, and ensure that when you’re in position, your gear is ready.
Feel the weight of your 400mm as you steady it on the bean bag. See the light shift from gold to orange. Hear the shutter click—that’s the sound of a shot you’ll print. Smell the dust of the savanna as you wait for the perfect moment.
The wildlife is waiting. The light is moving. And now, you know exactly what to bring.
Charles Lubega | Senior Wildlife Photographer & Safari Guide
15 Years Photographing Uganda’s Wildlife | Canon Ambassador | Photography Workshop Leader
Credentials: Professional Wildlife Photographer, Canon Ambassador (East Africa), Photography Workshop Leader, Member of Nature Photographers Network
