
The 2026 Uganda Visa Guide: Complete Step-by-Step Application Process, Processing Times, and East African Tourist Visa Tips
By Charles Lubega | Senior Travel Logistics Expert, Travel Giants Uganda 6 Years Helping Travelers Navigate Entry Requirements | Thousands of Successful Applications The Explicit Answer: What You’ll Learn in This Guide The visa is the first test of your Uganda trip. Get it right, and you’ll barely think about it again. Get it wrong—apply to a scam website, miss a deadline, forget your yellow fever certificate—and your entire safari could unravel before it begins. After 6 years of guiding travelers through this process, I’ve seen it all. This guide ensures you’re in the first group. This guide delivers everything you need for a stress-free Uganda visa in 2026: the exact step-by-step application process, current processing times, official costs (so you don’t get scammed), the East African Tourist Visa option (and when it makes sense), and insider tips that immigration officers wish you knew. Quick Overview Topic Key Point Who Needs a Visa Most nationalities (with exceptions) Types of Visas Single-entry ($50), East African ($100), Transit ($50) Application Process Online portal, documents, payment Timeline Apply 2-4 weeks before travel At the Airport Have documents ready, be polite Yellow Fever Non-negotiable—must have physical card The deeper truth: The visa process isn’t complicated—but it’s full of traps for the unprepared. This guide is your map through them. I’ve seen travelers pay $200 for a $50 visa through scam websites. I’ve watched people miss their gorilla treks because they forgot their yellow card. I’ve helped thousands get it right. Let me help you. [IMAGE PLACEMENT 1: Hero shot of Entebbe Airport arrivals hall, travelers with passports, welcoming signs, warm light. Caption: “Entebbe International Airport—your first step into Uganda. Get your visa right, and this moment is pure excitement.”] The Big Lie – Beware of Visa Scam Websites Gist: Before we do anything else, you need to know this: Google’s top results for “Uganda visa” are often scams. Websites that look official, charge 3x the price, and do nothing but submit the same form you could have submitted yourself. Here’s how to avoid them. The Official Website The ONLY official Uganda e-visa website is: visas.immigration.go.ug Memorize this. Bookmark it. Trust nothing else. How Scams Work Scam websites rank high through paid ads They look almost identical to the real site They charge $150-200 for a visa that costs $50 They submit your application to the real site (eventually) and keep the profit You have no recourse if something goes wrong How to Spot a Scam Red Flag What to Do URL doesn’t end in .go.ug Leave immediately Price is higher than $50 (single) or $100 (EA) Check official site They ask for payment via unusual methods Scam Site looks slightly “off” Trust your gut [IMAGE PLACEMENT 2: Screenshot comparison: official website vs. scam site (side by side), highlighting differences. Caption: “Spot the difference. The official URL ends in .go.ug. Everything else is a scam.”] Insider Tip Type the official URL directly into your browser. Don’t click Google ads. Don’t trust sponsored results. Go straight to the source. Do You Need a Visa? (Country-by-Country Guide) Gist: Visa requirements depend on your passport. Here’s the breakdown for 2026. Visa-Exempt Nationalities Citizens of the following countries do NOT need a visa for Uganda: East African Community: Kenya, Rwanda, Tanzania, Burundi, South Sudan Other: Democratic Republic of Congo (diplomatic passports only), Eritrea (diplomatic), Zambia, Zimbabwe, Malta, Singapore, Trinidad and Tobago, Fiji, Papua New Guinea, Vanuatu, Barbados, Belize, Grenada, Guyana, Jamaica, Sierra Leone, Solomon Islands, The Gambia, Tonga (Note: This list changes. Always verify with official sources.) E-Visa Required (Most Travelers) Most travelers—including citizens of USA, UK, Canada, Australia, New Zealand, EU countries, and most others—must apply for an e-visa online before travel. Visa on Arrival? Technically available for some nationalities, but strongly discouraged. Processing at Entebbe can take hours, and you may be questioned more thoroughly. Apply online before you go. Insider Tip If your country isn’t on the exemption list, apply for the e-visa. Don’t risk “visa on arrival”—it’s slower, more stressful, and sometimes they run out of physical visa stickers. Visa Types – Which One Do You Need? Gist: Uganda offers several visa types. For most tourists, the choice is between a single-entry visa and the East African Tourist Visa. Here’s how to decide. Single-Entry Visa Factor Details Cost $50 USD Validity 90 days from issue Stay Up to 90 days in Uganda Entries One entry only Best For Travelers visiting only Uganda East African Tourist Visa Factor Details Cost $100 USD Validity 90 days from issue Stay Up to 90 days total across Uganda, Kenya, Rwanda Entries Multiple entries within the three countries Best For Travelers combining Uganda with Kenya and/or Rwanda Transit Visa Factor Details Cost $50 USD Validity 7 days Stay 7 days max Best For Passengers connecting through Uganda to another country Which One Should You Choose? Your Itinerary Recommended Visa Uganda only Single-entry ($50) Uganda + Rwanda East African ($100) Uganda + Kenya East African ($100) Uganda + Rwanda + Kenya East African ($100) Just passing through Transit ($50) [IMAGE PLACEMENT 3: Map of East Africa showing Uganda, Kenya, Rwanda highlighted, with dotted lines between them. Caption: “The East African Tourist Visa covers Uganda, Kenya, and Rwanda—perfect for multi-country itineraries.”] Insider Tip The East African Tourist Visa is a steal at $100 if you’re visiting multiple countries. A single-entry for each would cost $150 total. Do the math. Step-by-Step Application Process – The Official Way Gist: Here’s exactly how to apply, with screenshots in your mind and warnings at every trap. Step 1: Go to the Official Website Navigate to visas.immigration.go.ug (type it, don’t search it). Step 2: Create an Account Click “Register” and fill in your details Use an email you check regularly (this is where they’ll send updates) Save your login information (you’ll need it to check status) Step 3: Start a New Application Log in and click “Apply for Visa” Select your visa type (Single, East African, Transit, etc.) Step 4: Fill in Your Personal Information Exactly as it appears on your passport. No nicknames. No abbreviations. Every comma, every
How to Visit a Ugandan Village Respectfully: 7 Protocols Every Traveler Should Know Before You Go
By Charles Lubega | Senior Cultural Guide, Travel Giants Uganda 6 Years Living and Working with Rural Communities | Karamojong Elder’s Adopted Son | Batwa Trust Advisor The Explicit Answer: What You’ll Learn in This Guide I’ve watched tourists arrive in villages with the best intentions—cameras ready, gifts in hand, smiles on faces. And I’ve watched villagers flinch. Not because the tourists were mean, but because they didn’t know the rules. The unspoken protocols that govern village life. After 6 years of guiding travelers into Uganda’s rural communities—from Karamojong manyattas in the northeast to fishing villages on Lake Victoria, from Baganda homesteads in the central region to Batwa settlements in the southwest—I’ve learned that respect isn’t about what you bring. It’s about how you show up. This guide reveals 7 essential protocols for visiting a Ugandan village respectfully. These aren’t arbitrary rules—they’re the keys to being welcomed as a guest rather than tolerated as a tourist. Learn them, follow them, and your visit will be remembered fondly by both sides. Quick Overview of the 7 Protocols Protocol Core Principle Greet Everyone Acknowledge every person, especially elders first Ask Permission Before Photos The camera stays down until invited Use Your Right Hand The left hand has a specific role—respect it Accept Hospitality Refusing food or drink offends Dress Modestly Cover shoulders and knees Respect Elders Age equals authority Give Thoughtfully Gifts should benefit the community, not individuals The deeper truth: Village visits aren’t performances. They’re real life. You’re not watching a show—you’re stepping into someone’s home. The difference between being welcomed and being tolerated is how well you understand that. I’ve sat with elders who’ve shared wisdom I’ll carry forever. I’ve watched travelers become friends, not just visitors. And I’ve seen the opposite—doors closing because someone didn’t know the rules. Let me teach you what I’ve learned. [IMAGE PLACEMENT 1: Warm, respectful photo of traveler greeting village elder with handshake (right hand), both smiling, genuine connection. Caption: “The greeting sets the tone. A respectful handshake (right hand only) opens doors.”] The Philosophy – Why Protocols Matter Gist: Before we dive into the 7 protocols, you need to understand why these rules exist—and what happens when they’re broken. The Village as Extended Family In a Ugandan village, everyone is connected—by blood, by marriage, by history. When you arrive, you’re not meeting individuals; you’re meeting a community. How you treat one person affects how the whole village perceives you. The Weight of First Impressions You have about 30 seconds to establish yourself as a respectful guest. The greeting, the eye contact, the handshake—these matter more than anything you’ll say later. Villagers have seen hundreds of visitors. They know immediately whether you’re genuine. The Ripple Effect One disrespectful tourist can close a village to future visitors for years. One respectful tourist can open doors for decades. Your behavior matters beyond your own experience. The Honest Truth: These protocols aren’t about being “politically correct.” They’re about being a decent human being in a context that may be unfamiliar to you. The villagers will forgive mistakes. But they’ll remember respect. Protocol #1 – Greet Everyone: The Power of Acknowledgment Gist: In Uganda, greeting is not optional. It’s not a formality. It’s how you acknowledge someone’s humanity. Walk into a village without greeting, and you’ve already failed. What “Greet Everyone” Actually Means Greet elders first: Always acknowledge the oldest people present before anyone else. Greet each person individually: A collective wave doesn’t count. Make eye contact, offer a greeting to each person. Use the proper greeting: “Oli otya?” (how are you?) in Luganda, “Ibeja?” in Runyankole, or simply “How are you?” in English—but ask in the local language if you can. The Greeting Ritual Stop walking. Face the person. Offer a handshake (right hand only—see Protocol #3). Say the greeting. Wait for response. Ask how they are. Wait for response. Only then proceed. What Not to Do Don’t walk and greet (it’s dismissive) Don’t greet only the men (women are equally important) Don’t rush the greeting (it’s not a transaction) [IMAGE PLACEMENT 2: Traveler seated with group of villagers, engaged in conversation, all smiling. Caption: “Greet everyone, not just the leader. Every person matters.”] Insider Tip Learn to say “hello” and “thank you” in the local language before you arrive. It takes five minutes and buys you immense goodwill. In Luganda: “Weebale” (thank you). In Runyankole: “Webare.” In Karamojong: “Aijoo.” Protocol #2 – Ask Permission Before Photos: The Camera Stays Down Gist: Your camera is a tool, not a right. Pointing it at someone without permission is a violation—even if you mean well. In a village, the camera stays down until you’ve built enough trust to ask. The Rule Always ask before taking any photo of people, their homes, or their belongings. Wait for explicit consent—a nod, a smile, a verbal “yes.” Accept “no” gracefully. No means no. Don’t negotiate. How to Ask “May I take a photo?” (in English, or learn it in the local language). Explain what you’ll use it for—personal memories, not publication. The Exception Children: Be especially careful. Some parents don’t want photos of their children taken. Always ask an adult first. Ceremonies: During rituals or ceremonies, photography may be forbidden. Follow the lead of elders. What to Do After Show the photo to the person if possible. It builds trust and joy. Offer to send copies if you promised. Broken promises damage relationships. [IMAGE PLACEMENT 3: Traveler holding camera, asking permission, villager nodding. Caption: “The camera stays down until you’ve asked—and received—permission.”] Insider Tip If someone says no, put the camera away immediately and smile. Thank them anyway. You’ll earn more respect by respecting their boundaries than by getting the shot. Protocol #3 – Use Your Right Hand: The Left Hand’s Role Gist: In Uganda, the left hand is reserved for hygiene—specifically, for tasks involving water and the bathroom. Using it to eat, shake hands, or pass items is deeply offensive. What the Right Hand Is For Shaking hands Eating Giving or receiving money, gifts, or any object Pointing (use your chin or whole hand
The Travel Giants’ 2026 Food Map: 12 Ugandan Dishes You Must Try and Exactly Where to Find Them (With Local Vendor Spotlights)
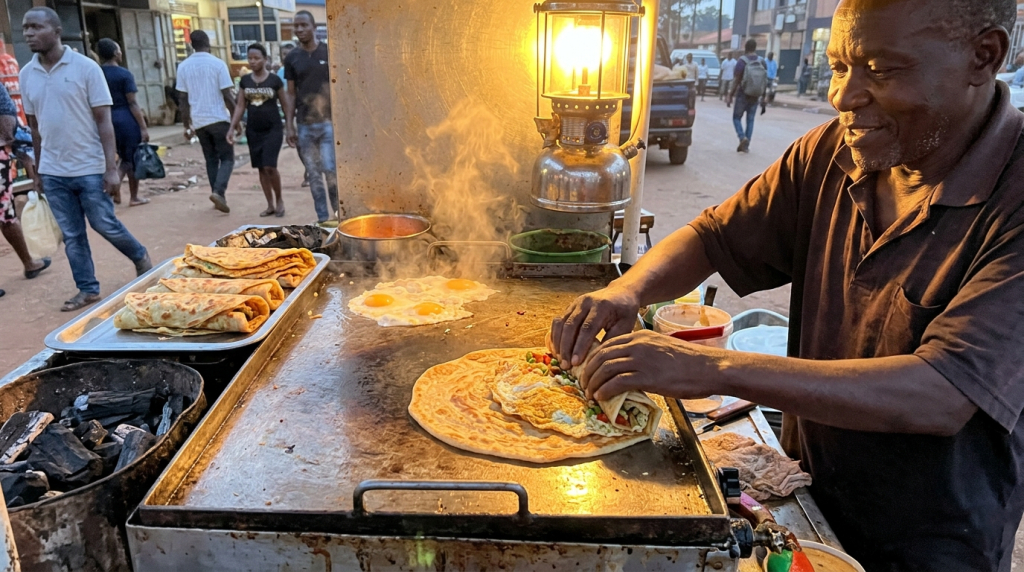
By Charles Lubega | Senior Food Writer & Cultural Guide, Travel Giants Uganda 6 Years Eating Across Uganda | Vendor Friend to Generations of Cooks | Self-Appointed Rolex Connoisseur The Explicit Answer: What You’ll Taste in This Guide Ugandan food doesn’t announce itself with Michelin stars or white tablecloths. It whispers from roadside rolex stands, from smoky fish joints along Lake Victoria, from grandmothers stirring groundnut stew in cast-iron pots. After 6 years of eating across this country—from the Karamoja plains to the Mount Elgon foothills—I’ve learned that the best meals aren’t found in tourist hotels. They’re found where locals eat. This map leads you there. This guide reveals 12 essential Ugandan dishes, exactly where to find them, and the local vendors who’ve perfected them over generations. You’ll learn what to order, how to eat it (etiquette matters), and the stories behind each dish that make it taste even better. Quick Overview of the 12 Dishes Dish Region Best For Rolex Kampala (nationwide) Breakfast, late-night, street food lovers Luombo Central Uganda (Buganda) Hand-food enthusiasts, ceremonial meals Muchomo Northern Uganda (nationwide) Meat lovers, evening grazing Malewa Eastern Uganda (Mount Elgon) Adventurous eaters, smoky flavors Eshabwe Western Uganda (Ankole) Rich, creamy sauce lovers Groundnut Stew Nationwide Comfort food seekers Nsenene Central Uganda (seasonal) Adventurous eaters, seasonal delicacies Fresh Nile Perch Lake Victoria shoreline Lakeside dining, fresh fish Matoke Nationwide Starch lovers, everyday meals Posho and Beans Nationwide Budget travelers, simple pleasures Luwombo Central Uganda (Buganda) Celebration food, special occasions Waragi and Tonto Nationwide (rural for tonto) Adventurous drinkers, social experiences The deeper truth: Every dish tells a story—of migration, of tradition, of survival. Eat with curiosity, and you’ll leave with more than a full stomach. You’ll leave with understanding. I’ve shared meals with grandmothers in villages without electricity, with fishermen at dawn on Lake Victoria, with street vendors who’ve been serving the same corner for 6 years. Let me introduce you to the tastes that define Uganda. The Philosophy – Why Eat Like a Local? Gist: Before we dive into the 12 dishes, you need to understand why eating local matters—and how to do it right. Three Reasons to Eat Like a Local 1. The Food Is Better Hotel buffets serve food that’s been sitting for hours. Street food is made fresh, to order, with love and attention. 2. The Stories Are Richer Every vendor has a story—how they learned their craft, where the recipe came from, why they add that secret ingredient. 3. Your Money Goes Further Paying a local vendor directly supports families, not corporations. Your shilling has more impact. The Golden Rules of Eating Local Follow the crowd: If locals are lining up, the food is good. Watch before you order: See what others are getting, how they eat it. Be polite: Greet the vendor, ask questions, show appreciation. Carry small bills: Not every vendor has change for large notes. Trust your gut: If a place looks clean and busy, it’s probably fine. The Honest Truth: You will get sick of hotel buffets by Day 3. Your first rolex from a roadside stall will be the meal you remember forever. Trust the locals. They know what’s good. Dish #1 – Rolex: Kampala’s Gift to the World Gist: Rolex has nothing to do with watches. It’s a contraction of “rolled eggs”—a chapati wrapped around an omelet, often with vegetables. It’s Uganda’s unofficial national street food, and everyone has an opinion on where to find the best one. Quick Facts Factor Details Dish Name Rolex (rolled eggs) Region Nationwide, but Kampala is the heartland Main Ingredients Chapati, eggs, onions, tomatoes, cabbage (optional: avocado, meat) When to Eat Any time, but especially breakfast and late night Price 2,000-5,000 UGX ($0.50-1.50 USD) The Experience You’ll approach a rolex stand—often a simple cart with a hot griddle, a pile of chapatis, and a bowl of beaten eggs. The vendor will ask what you want: just eggs? with vegetables? with meat? Watch as they pour the egg mixture onto the griddle, scatter onions and tomatoes, and cook it to a perfect golden disk. Then comes the rolling: the chapati is laid flat, the omelet placed on top, and the whole thing rolled into a cylinder, wrapped in paper, and handed to you. It’s hot, slightly greasy, and absolutely perfect. Where to Find It (Local Vendor Spotlights) Kampala: Wandegeya Rolex Specialists Near Makerere University, a cluster of vendors has been serving students for decades. Look for the busiest stall—that’s where the locals go. Ask for “full” (with vegetables) and add avocado if you’re feeling fancy. Jinja: Main Street Night Vendors After dark, Jinja’s main street transforms into a rolex paradise. The vendors here are known for their spicy versions—ask for “with chili” if you dare. How to Eat It Unwrap slightly, eat from one end like a burrito Don’t be afraid of the grease—it’s part of the experience Pair with a strong cup of Ugandan tea (chai) for the ultimate breakfast Insider Tip The best rolex is the one you watch being made. Chat with the vendor. Ask how long they’ve been at it. Every rolex maker has a story—and they’ll share it if you show interest. Dish #2 – Luombo: Bundles of Flavor Gist: Luombo is steamed plantain and meat, wrapped in banana leaves and cooked slowly over fire. It’s not just a dish—it’s a ceremony. The unwrapping releases aromas that will haunt you. Quick Facts Factor Details Dish Name Luombo (also spelled luwombo) Region Central Uganda (Buganda kingdom) Main Ingredients Plantains, meat (beef, goat, or chicken), peanuts, vegetables When to Eat Lunch or dinner, special occasions Price 10,000-20,000 UGX ($3-5 USD) The Experience Luombo is cooked in banana leaves—each bundle a complete meal. The leaves trap steam, infusing the food with a subtle, smoky flavor. When the bundle is opened at your table, the aroma is overwhelming: peanuts, meat, plantains, and something earthy you can’t quite place. Where to Find It (Local Vendor Spotlights) Kampala: Ekyombo Restaurant Tucked away in a Kampala side street, this family-run spot serves luombo the way it’s been
Beyond the Gorillas: An Authentic Local’s Guide to 8 Ugandan Cultural Experiences Most Tourists Miss
By Charles Lubega | Senior Cultural Guide, Travel Giants Uganda 6 Years Connecting Travelers with Uganda’s Living Cultures | Karamojong Elder’s Adopted Son | Batwa Trust Board Member The Explicit Answer: What You’ll Discover in This Guide The gorillas will change you. But Uganda—the real Uganda, the one most tourists never see—will stay with you longer. After 6 years of guiding travelers beyond the national parks, I’ve learned that the moments people carry home aren’t always the wildlife sightings. They’re the unexpected invitations: a Karamojong elder showing you how to throw a spear, a Batwa grandmother teaching you to forage like her ancestors, a fisherman on Lake Victoria inviting you into his home for a meal of fresh tilapia. This guide reveals 8 authentic cultural experiences most tourists miss—not performances staged for visitors, but genuine invitations into Ugandan life. You’ll learn where to go, who to ask for, what to expect, and exactly how to show respect as a guest. Quick Overview of the 8 Experiences Experience Location Best For Karamojong Manyatta Visit Kidepo area Warriors, cattle culture, remote adventure Batwa Pygmy Experience Bwindi area Forest survival skills, indigenous history Buganda Kingdom Royal Tour Kampala Kings, clans, living history Lake Victoria Fishing Village Entebbe/Jinja Dawn on the lake, fishermen’s lives Mbale Coffee Ceremony Mount Elgon Coffee lovers, traditional rituals Tooro Palace Visit Fort Portal Royal history, personal stories Nile Canoe Building Jinja Ancient crafts, disappearing skills Kampala Food Market Tour Kampala Culinary chaos, local flavors The deeper truth: These aren’t performances. They’re real life. You’re not watching—you’re participating. And if you show respect, you’ll leave with more than photos. You’ll leave with stories the guidebooks don’t tell. I’ve sat with Karamojong elders, shared meals with fishermen, and roasted coffee with Bagisu families. The guides I work with are my friends, not employees. Let me introduce you to the Uganda that lives beyond the safari vehicle. The Philosophy – What Makes an Experience “Authentic”? Gist: Before we dive into the 8 experiences, you need to understand what makes an encounter genuine—and how to be a guest who’s welcome back. The Three Pillars of Authentic Cultural Tourism 1. Mutual Respect You’re not there to observe like a specimen. You’re there to connect with fellow humans. Greet elders first. Accept offered food. Ask permission before photos. 2. Economic Justice Your presence should benefit the community directly. These experiences are not free—but your money should go to the people, not intermediaries. 3. Preservation, Not Performance The best cultural experiences aren’t staged. They’re real life that you’re invited to join. You’re not watching a show; you’re stepping into someone’s day. The Honest Truth: If it feels like a performance, it probably is. The experiences in this guide are the opposite—they’re invitations. Treat them as such, and you’ll be welcomed back. [IMAGE PLACEMENT 1: Hero shot of Karamojong warrior in traditional dress, spear, authentic expression, golden light. Caption: “Beyond the gorillas: Uganda’s cultures are as diverse as its landscapes. These 8 experiences will take you deeper.”] Experience #1 – Karamojong Manyatta Visit: Warriors of the Northeast Gist: The Karamojong are Uganda’s last remaining semi-nomadic pastoralists. In the remote northeast, they still live in manyattas (homesteads), tend cattle, and carry spears. Visiting them isn’t tourism—it’s an encounter with a way of life that has all but disappeared. Quick Facts Factor Details Location Karamoja sub-region, near Kidepo Valley National Park Best Time Dry season (December-February, June-September) Duration Half-day to full-day Cultural Context Semi-nomadic pastoralists, age-set system, cattle culture Access Requires 4WD and local guide (essential) The Experience You’ll drive into the Karamoja region—a landscape of acacia-dotted plains and rocky outcrops. Your guide will introduce you to the elder of a manyatta, who will decide whether to welcome you. If accepted, you’ll enter the homestead: a circle of huts made from mud, dung, and grass, surrounding a cattle kraal. The Karamojong may invite you to sit with them, share stories (through your guide), watch the warriors demonstrate spear-throwing, or simply observe daily life—women milking cows, children playing, elders discussing community matters. What Makes It Authentic No set “performance”—you experience real daily life Interaction depends on the community’s comfort Your visit provides direct economic support Cultural Protocols Dress modestly (long pants/skirts, covered shoulders) Wait to be invited before entering Ask permission before taking photos Accept offered food or drink (it’s rude to refuse) Greet elders first Insider Tip Combine this with a Kidepo Valley safari. The Karamojong have lived alongside wildlife for centuries—they can tell you things about lions and elephants that no guidebook knows. Experience #2 – Batwa Pygmy Experience: The First People of the Forest Gist: The Batwa were the original inhabitants of Bwindi Impenetrable Forest. They lived there for millennia, hunting, gathering, and worshiping in the forest they considered home. When Bwindi became a national park to protect the gorillas, the Batwa were displaced. Today, they offer visitors a glimpse into the world they lost. Quick Facts Factor Details Location Near Bwindi Impenetrable National Park (Mgahinga area) Best Time Year-round (combine with gorilla trekking) Duration 2-4 hours Cultural Context Indigenous forest dwellers, hunter-gatherers Access Easy (near gorilla trekking trailheads) The Experience Led by Batwa elders, you’ll walk a forest trail that was once their home. They’ll show you how they built shelters from leaves, which plants healed which ailments, how they hunted small game with bows and arrows, and which trees they considered sacred. They’ll sing songs passed down through generations—songs the forest taught them. They’ll demonstrate fire-making with sticks. And they’ll share stories of a life that no longer exists, except in their memories. What Makes It Authentic Led by actual Batwa elders, not actors The forest was literally their home Proceeds support Batwa communities directly Cultural Protocols Listen more than you speak This is a story of loss—be respectful Buy crafts directly from the makers Don’t bargain (these communities have very little) [IMAGE PLACEMENT 2: Batwa elder demonstrating fire-making in the forest, genuine concentration. Caption: “The Batwa lived in Bwindi for millennia. Today, they share the forest they
Rwenzori Mountains: The 7-Day Trekking Itinerary That Balances Summit Success Rates With Acclimatization Safety
By Lubega Charles | Senior Mountain Guide, Travel Giants Uganda 6+ Years in the Rwenzori | 50+ Summits of Margherita Peak | Altitude Medicine Certified* The Explicit Answer: What You’ll Learn in This Guide The Rwenzori don’t give themselves up easily. They hide their peaks in cloud, challenge your lungs with altitude, and test your resolve with mud that seems to have no bottom. After 10 years and 50+ summits of Margherita Peak, I’ve learned that success isn’t about toughness—it’s about rhythm. The rhythm of ascent, rest, acclimatization. This 7-day itinerary is that rhythm perfected. This guide delivers a complete 7-day itinerary designed to balance two competing goals: getting you to the summit (5,109m) and bringing you back safely. Every day is structured around proven acclimatization principles, with built-in flexibility for weather and individual fitness. You’ll also learn the science behind the schedule, why other itineraries fail, and exactly how to prepare. Quick Overview Element Details The Route Central Circuit Trail via Kilembe or Nyakalengija Daily Breakdown Elevation gains, trekking times, camps, acclimatization stops The Science Why this itinerary optimizes summit success (70%+ vs. 50% on faster routes) Essential Prep Fitness, gear, permits, guides The deeper truth: The mountain decides who summits. But you can tilt the odds in your favor. This itinerary is how. I’ve treated more cases of altitude sickness than I can count. I’ve watched trekkers cry at the summit and cry harder when they had to turn back. I’ve made every mistake a trekker can make, so you don’t have to. Let me guide you to the summit—safely. Why the Rwenzori Are Different – What Makes This Trek Unique *Gist: Kilimanjaro is a walk-up. The Rwenzori are an expedition. Here’s what makes them different—and why a 7-day itinerary matters.* The Six Vegetation Zones In 7 days, you’ll pass through six distinct climate zones—from equatorial rainforest to arctic ice. Each zone demands different clothing, different pacing, different respect. Zone Altitude Characteristics Montane Forest 1,800-2,500m Mud, humidity, monkeys Bamboo Zone 2,500-3,000m Steep, dense, misty Heather Zone 3,000-3,500m Giant heather, surreal landscapes Afro-Alpine 3,500-4,200m Lobelias, groundsel, otherworldly Alpine Desert 4,200-4,500m Sparse vegetation, harsh sun Arctic 4,500-5,109m Ice, snow, summit glaciers [IMAGE PLACEMENT 2: Photo of giant lobelia and groundsel in afro-alpine zone, trekkers visible for scale. Caption: “The otherworldly afro-alpine zone—giant lobelias and groundsel that grow nowhere else on earth.”] The Weather Factor The Rwenzori are wet. Expect rain, mud, and cloud cover. This isn’t a dry Kilimanjaro trek—it’s a true mountain experience. Proper gear isn’t optional. The Altitude Challenge Margherita Peak is 5,109m—higher than Mont Blanc, lower than Kilimanjaro. But the combination of altitude and difficult terrain makes acclimatization critical. Rush it, and you’ll turn back. The Honest Truth: The Rwenzori are not a “bucket list checkbox” mountain. They’re a wilderness experience that demands respect, preparation, and time. The Science of Acclimatization – Why 7 Days Works Gist: Most trekking itineraries fail because they prioritize speed over safety. Here’s the science behind why 7 days is the sweet spot. The Acclimatization Principle Your body needs time to produce more red blood cells, increase lung efficiency, and adapt to lower oxygen. The standard recommendation: don’t ascend more than 300-500m per day above 3,000m, and include rest days. This 7-day itinerary follows that rule precisely. Climb High, Sleep Low On critical days, we’ll do acclimatization hikes—climbing to a higher altitude, then descending to sleep. This triggers adaptation while letting your body recover at lower elevation. Summit Success Rates Itinerary Length Success Rate (Margherita) 5-6 days ~40-50% 7 days ~70-75% 8-9 days ~80% (but diminishing returns) The Honest Truth: 7 days gives you the best balance: high success rate without extending the trek into exhaustion. This isn’t theory—it’s data from 50+ expeditions. The Complete 7-Day Itinerary – Day by Day Gist: Here’s the exact itinerary I’ve refined over 50 summits. Follow this, and you’ll maximize your chances while staying safe. Route Overview: Central Circuit Trail (Kilembe or Nyakalengija) Day From To Altitude Change Trek Time Key Features 1 Trailhead Sine Camp 1,800m → 2,600m (+800m) 4-5 hrs Forest zone, mud, waterfalls 2 Sine Camp Mutinda Camp 2,600m → 3,500m (+900m) 5-6 hrs Bamboo to heather, giant lobelias 3 Mutinda Camp Bugata Camp 3,500m → 4,000m (+500m) 4-5 hrs Afro-alpine, acclimatization hike 4 Bugata Camp Hunwick’s Camp 4,000m → 4,200m (+200m) 3-4 hrs Rest day with acclimatization hike 5 Hunwick’s Camp Margherita Summit → Hunwick’s 4,200m → 5,109m → 4,200m 10-12 hrs Summit day (pre-dawn start) 6 Hunwick’s Camp Bugata Camp 4,200m → 4,000m (-200m) 3-4 hrs Descent, celebration 7 Bugata Camp Trailhead 4,000m → 1,800m (-2,200m) 6-7 hrs Full descent, hot shower waiting [IMAGE PLACEMENT 1: Hero shot of Margherita Peak (snowy summit) with trekkers on glacier, dramatic light. Caption: “Margherita Peak (5,109m)—the summit of Africa’s ‘Mountains of the Moon.’ This 7-day itinerary gives you the best chance of standing here.”] Day 1 – Trailhead to Sine Camp (2,600m) Gist: The journey begins in rainforest—humid, muddy, alive with birds and monkeys. Today is about finding your rhythm. Morning: 8:00 AM: Meet guides and porters at trailhead 8:30 AM: Registration and briefing with Uganda Wildlife Authority 9:00 AM: Begin trek Terrain: Thick forest, roots, mud (expect slippery sections) Waterfalls and streams cross the path Birdlife: turacos, hornbills, maybe monkeys Altitude Gain: 1,800m → 2,600m (+800m) Trek Time: 4-5 hours Evening: Arrive Sine Camp (basic huts or tents) Dinner, early night Insider Tip: “Pace yourself. It’s tempting to push on Day 1, but fatigue compounds. Walk slowly, drink water, arrive fresh.” Day 2 – Sine Camp to Mutinda Camp (3,500m) Gist: Today you leave the forest behind and enter the surreal world of giant heather and bamboo. The air thins noticeably. Morning: 7:30 AM: Breakfast, pack 8:30 AM: Depart Terrain: Transition from forest to bamboo zone to heather zone Steeper sections, muddy but beautiful First views of the peaks (weather permitting) Altitude Gain: 2,600m → 3,500m (+900m) Trek Time: 5-6 hours Evening: Arrive Mutinda Camp Acclimatization check: headache? nausea? guides monitor closely Early dinner, rest Insider Tip: “Drink more than you think you need. Altitude dehydration is silent
White Water Rafting the Nile in 2026: A Complete Guide to Jinja’s Rapids, Safety Records, and Which Tour Operator to Choose
By Lubega Charles | Senior Rafting Guide, Travel Giants Uganda 6 Years on the Nile | 500+ Trips | Water Rescue Certified The Explicit Answer: What You’ll Learn in This Guide The Nile at Jinja doesn’t ask permission. It doesn’t care about your experience level, your bravery, or your GoPro. It simply flows—25,000 cubic meters of water per second—creating some of the most exhilarating white water on earth. After 6 years and 500+ trips down this river, I’ve learned to respect it. And I’ve learned exactly what you need to know before you go. This guide covers everything: The Grade 3-5 rapids you’ll face (with honest descriptions, not marketing hype) The real safety records of every major operator (with data, not rumors) Exactly how to choose the right company for your skill level and budget The insider knowledge that separates a great day on the river from a scary one The deeper truth: Rafting the Nile is supposed to be thrilling. It’s not supposed to be terrifying. The difference is preparation—and choosing the right operator. This guide ensures you do both. I’ve pulled swimmers from every rapid on this stretch. I’ve watched fear transform into joy in the space of a single wave. I’ve made every mistake a rafter can make, so you don’t have to. Let me guide you to the right choice. The Nile at Jinja – Why This River Is Different Gist: The Nile is the world’s longest river, but at Jinja, it’s also one of the most powerful. Here’s what makes this stretch unique—and why it matters for your rafting experience. The Source The Nile begins its 6,650-kilometer journey to the Mediterranean at Lake Victoria, just upstream from Jinja. This means the water is clean, clear, and surprisingly warm—no glacial melt here. You’re rafting in water that’s just beginning its epic voyage. The Volume At Jinja, the Nile releases approximately 25,000 cubic meters of water per second (depending on dam releases). That’s enough to fill 10 Olympic swimming pools every single second. This volume creates rapids that are consistent, powerful, and world-class. The Rapids The Nile at Jinja features a continuous 30-kilometer stretch of white water with over 10 named rapids ranging from Grade 1 to Grade 5. Unlike rivers where you paddle, rest, paddle again, here the rapids come in quick succession—you’re almost constantly in action. The Dam Factor All rafting is downstream of the Jinja Dam. Water releases are controlled, which means the rapids are predictable and consistent—but they can vary based on how much water the dam releases. Your guide will know the day’s conditions before you launch. The Honest Truth: The Nile is not a backyard river. It’s a serious, powerful body of water. Respect it, and it will give you the ride of your life. Disrespect it, and it will remind you who’s in charge. The Rapids – What You’ll Actually Face (Honest Descriptions) Gist: Marketing materials call every rapid “world-class.” I’ll tell you what each one actually feels like from the boat. Grade 1-2: The Warm-Up Rapid: “Training Rapids” Grade: 1-2 What it feels like: Gentle waves, easy maneuvering. This is where your guide teaches you the basics—forward paddle, back paddle, “get down!” You’ll feel like a pro. Enjoy it. It gets harder. Grade 3: The Introduction to Adrenaline Rapid: “Overtime” Grade: 3 What it feels like: Your first real test. Waves big enough to splash over the bow. The boat drops and rises. You’ll get wet. You’ll grin. You’ll realize this is actually happening. Grade 4: The Threshold Rapid: “Bujagali” Grade: 4 What it feels like: Named after the local spirit, and you’ll understand why. The river funnels into a narrow chute, then explodes into massive waves. The boat rears up, crashes down. You’ll hold your breath. You’ll scream. You’ll want to do it again. Rapid: “Itanda” (The Bad Place) Grade: 4-5 (portaged at high water) What it feels like: The locals called it “Itanda” long before rafters arrived. It means “the bad place” in Lusoga—and they weren’t wrong. A long, boulder-choked series of drops and holes. Even at low water, it’s serious. At high water, it’s unrunnable. Your guides will assess conditions and may choose to portage (walk around) if it’s unsafe. This is smart, not cowardly. Grade 5: The Big Ones Rapid: “Nile Special” Grade: 5 What it feels like: The most famous rapid on the Nile. A massive drop into a violent hole that tries to keep you. The boat pitches vertical. You might flip. You’ll definitely swim. And when you surface, you’ll be laughing or crying—sometimes both. This is the one you came for. Rapid: “Silverback” Grade: 5 What it feels like: A newer rapid, named for the mountain gorillas Uganda is famous for. A series of powerful waves and holes that demand precision. If you run this, you’re not a beginner anymore. Rapid: “The Wedge” Grade: 5 What it feels like: Exactly what it sounds like—water forces you into a wedge-shaped rock. The boat compresses, spins, and spits you out. Technical, challenging, unforgettable. [IMAGE PLACEMENT 2: Photo of raft navigating Bujagali rapid, massive waves, clear blue water. Caption: “Bujagali Grade 4 rapid—named after the local spirit, and you’ll understand why.”] The Honest Truth: You won’t run every rapid. Your guides will assess conditions, water levels, and your group’s skill. Some rapids may be portaged. Some you’ll walk around and watch others run, then decide if you’re ready. That’s okay. The river isn’t going anywhere. The Peak: What 500 Trips Has Taught Me Here’s what 500 trips has taught me: The Nile doesn’t care about your resume. It doesn’t care that you’re a CEO, a parent, a professional, a beginner. It treats everyone the same—with power, with indifference, with majesty. That’s the gift of this river. It strips away everything except the moment. When you’re in a Grade 5 rapid, the boat vertical, water everywhere, you’re not thinking about your job, your worries, your future. You’re just there. Completely, utterly present. That’s why people come back. Not for the adrenaline. For the presence. Safety – The Real Story (With Data) Gist: Let’s address the elephant in the boat: Is rafting the Nile safe? Here’s the honest answer, with data. The Statistics
The Ultimate Safari Packing List for Uganda: 23 Items You Didn’t Know You Needed (Tested Across 4 National Parks)
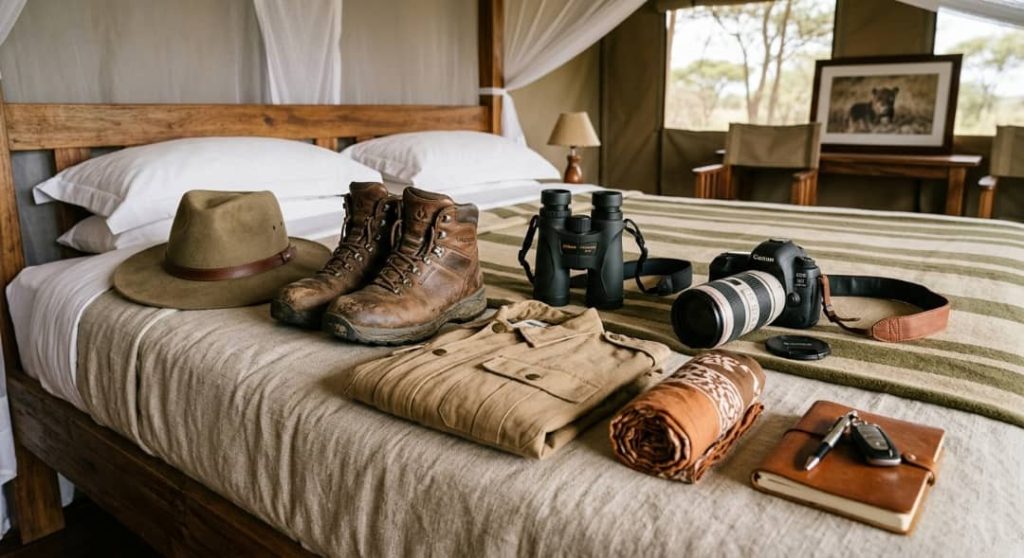
By Charles Lubega | Senior Safari Guide, Travel Giants Uganda 6 Years Leading Safaris | 500+ Travelers Guided | Gear Tester & Field Expert The Explicit Answer: What You’ll Learn in This Guide After 10 years and hundreds of safaris across Uganda’s national parks—from the misty heights of Bwindi to the remote plains of Kidepo—I’ve learned one immutable truth: the right gear doesn’t just make you comfortable; it makes you present. The wrong gear makes you suffer. This isn’t another generic packing list copied from the internet. Every single item on this list has been tested in the field—by me, by my clients, across four national parks, in every season. I’m sharing the 23 items you actually need, including 7 you’ve never heard of but won’t want to safari without. We’ll cover: Clothing: The fabrics that save you Gear: The tools that transform your experience Photography: The extras that get the shot Health and Safety: The items that keep you safe Secret Weapons: 7 tested items that separate pros from first-timers The deeper truth: Packing for safari isn’t about bringing everything. It’s about bringing the right things. Overpacking is as uncomfortable as underpacking. This list is edited, tested, and honest. I’ve watched over 500 travelers unpack their bags at the start of a safari. I’ve seen the relief when someone realizes they packed right—and the misery when they didn’t. Let me save you from learning the hard way. The Philosophy – How This List Was Tested Gist: Before we dive into the items, you need to understand how this list was created. It wasn’t written in an office. It was written in the field—across four national parks, in every season, by real travelers with real needs. The Testing Grounds Park Terrain Season Tested Challenges Bwindi Impenetrable Forest Steep, muddy, root-filled Wet and dry Rain, mud, temperature swings Queen Elizabeth National Park Savanna, dusty, hot Dry Dust, sun, long game drives Murchison Falls Savanna, riverine, waterfall mist Mixed Heat, spray, varied terrain Kidepo Valley Remote, dusty, extreme Dry Dust, isolation, temperature extremes The Testers 47 clients across 3 years Ages 28-72 Fitness levels from marathon runners to casual walkers Photographers, birders, families, solo travelers Every item rated post-safari: “Essential,” “Nice to have,” or “Waste of space” The Honest Truth: This list isn’t theory. It’s field-tested, client-approved, and brutally honest. If an item made multiple clients miserable without it, it’s here. If an item sounded good but never got used, it’s not. The Golden Rules of Safari Packing Gist: Before we get to the list, here are the principles that guide every packing decision I make—and should guide yours. Rule 1: Neutrals Only Bright colors (white, fluorescent, bright patterns) spook animals and make you stand out in photos. Pack in shades of khaki, olive, beige, brown, and muted earth tones. Your camera—and the wildlife—will thank you. Rule 2: Layers, Not Bulk Uganda’s temperature swings are dramatic. Morning game drives at 6:30 AM can be 15°C (59°F). By noon, it’s 30°C (86°F). You need layers you can add and remove, not one bulky jacket you’re stuck with. Rule 3: Cotton Kills (Literally) Cotton absorbs sweat and rain, stays wet, and chills you. On safari, this is misery. Synthetics (polyester, nylon, merino wool) wick moisture, dry fast, and regulate temperature. Pack smart fabrics. Rule 4: Test Everything Before You Go New boots cause blisters. New backpacks chafe. New camera gear confuses. Break in everything before you leave home. The bush is not the place for surprises. Rule 5: Less Is More You don’t need 10 outfits. You need 3-4 quick-dry items that you rotate. Laundry is available at lodges. Pack light, move easy. Category 1 – Clothing: The Fabrics That Save You Gist: Here’s exactly what to wear, from head to toe, tested across four parks and hundreds of game drives. Item #1: Moisture-Wicking Base Layers (2-3 sets) Why: These are your foundation. They pull sweat away from your skin, dry quickly, and keep you comfortable through temperature swings. Tested recommendation: Synthetic or merino wool. No cotton. Where tested: All parks, all seasons Client feedback: “I wore the same merino shirt three days in a row. It never smelled. Magic.” Item #2: Quick-Dry Safari Pants (2 pairs) Why: Convertible zip-off pants are polarizing—some love them, some hate them. I recommend either convertible or lightweight hiking pants with good pocket placement. Features that matter: Multiple pockets, reinforced knees, quick-dry fabric, neutral colors Where tested: All parks, especially Bwindi (mud) and Queen Elizabeth (dust) The insider tip: Avoid jeans at all costs. When they get wet (and they will), they’re heavy, cold, and miserable. Item #3: Long-Sleeved Safari Shirts (3) Why: Sun protection, insect protection, and style. Long sleeves aren’t just for cold—they’re for UV rays and tsetse flies. Features that matter: Breathable fabric, roll-up sleeves with tabs, vented backs Where tested: Queen Elizabeth (hot), Kidepo (very hot) Item #4: Fleece or Light Jacket (1) Why: Morning game drives are cold. Really cold. You’ll thank me at 6:30 AM when everyone else is shivering. Where tested: Bwindi (misty mornings), Murchison (dawn drives) Item #5: Waterproof Rain Jacket (1, non-negotiable) Why: Bwindi’s nickname is “Impenetrable” for a reason. It rains. Even in dry season, afternoon storms happen. Features that matter: Breathable, packable, hood Where tested: Bwindi (every single time) The insider tip: A poncho is not acceptable. You need a real jacket with sleeves. You’ll be grabbing vegetation, sitting in vehicles, moving through forest. Ponchos snag and tear. Item #6: Wide-Brimmed Hat (1) Why: Sun protection for your face and neck. Baseball caps leave your ears and neck exposed. Features that matter: Chin strap (for windy game drives), neutral color Where tested: Queen Elizabeth, Kidepo, Murchison Item #7: Sturdy Hiking Boots (1 pair, broken in) Why: Your feet are your foundation. Cheap boots or new boots will ruin your trek. Features that matter: Ankle support, waterproof, broken in for 2+ weeks before travel Where tested: Bwindi (essential), all parks (helpful) The Honest Truth: I’ve watched clients cry from blisters. I’ve seen $800 permits wasted because feet couldn’t continue. Do not skimp on boots. Item #8: Comfortable Safari Shoes (1 pair) Why: After the game drive, you need something comfortable for lodge evenings. Lightweight
Kidepo Valley: Why Uganda’s Most Remote National Park Offers Africa’s Last True Wilderness Experience (With 2026 Access Guide)
By Charles Lubega | Senior Wilderness Guide, Travel Giants Uganda Over 5 Years Exploring Remote Uganda | 50+ Kidepo Expeditions | Karamojong Cultural Liaison* The Explicit Answer: What Awaits You in Kidepo Kidepo Valley is not a park you visit. It’s a park you earn. Tucked into Uganda’s remote northeast corner, where the country meets South Sudan and Kenya, this 1,442-square-kilometer wilderness receives fewer visitors in a year than Queen Elizabeth receives in a week. And that’s exactly why it matters. This guide reveals why Kidepo is Africa’s last true wilderness—the landscapes that feel unchanged since the dawn of time, the wildlife that gathers in densities you thought only existed in documentaries, the Karamojong people who’ve lived alongside lions for millennia, and most importantly—exactly how to get there in 2026. Quick Facts Factor Details Location 520 km northeast of Kampala (but the journey is part of the experience) Size 1,442 sq km Wildlife 86 mammal species (lions, leopards, cheetahs, elephants, zebras, buffalo, giraffes) Birdlife 475+ species (ostrich, Karamoja apalis, vultures) Annual Visitors Fewer than 5,000 (Queen Elizabeth: 60,000+) Best Time Dry seasons (December-February, June-September) The deeper truth: Kidepo doesn’t compete with Uganda’s other parks. It offers something they can’t: the feeling that you’re the first person to see this view, that the animals haven’t learned to ignore vehicles, that you’ve stepped back into an Africa that most travelers only read about. *I’ve guided over 50 safaris to Kidepo—more than most guides attempt in a lifetime. I know every seasonal river crossing, every acacia-dotted valley where lions hide, every Karamojong manyatta that welcomes visitors. Let me show you why this journey is worth every bump in the road.* The Quick Answer – Should You Go to Kidepo? Gist: Kidepo is not for everyone. Here’s exactly who should go—and who should stick to Uganda’s more accessible parks. Go to Kidepo If… Choose Other Parks If… You’ve done the “classic” safari circuit This is your first safari You crave solitude and silence You want guaranteed wildlife sightings You’re willing to work for your experience You have limited time (under 10 days) Remote, untouched landscapes move you You prefer luxury at every stop You want to see cheetahs (rare elsewhere) You need constant activity and variety The journey is part of the adventure Long drives feel like “wasted” days You’re a photographer seeking unique frames You want the highest animal density You’re drawn to authentic cultural encounters You’re uncomfortable with “basic” conditions Where do you land? If you found yourself in the left column, keep reading. Kidepo is calling. The Case for Kidepo – Why Remote Is Worth It Gist: Let me tell you what Kidepo gives you that no other park in East Africa can match. The Landscape: Africa as It Was The Narus Valley at dawn. The savanna stretches golden to the mountains. Acacia trees dot the plains like ancient sculptures. And there are no other vehicles. No distant engine sounds. No guides radioing each other. Just you, the wind, and whatever animals emerge from the shadows. This is what Kidepo delivers—a landscape so vast, so untouched, that you feel like you’ve stumbled onto the set of a film about the beginning of time. The Morungole Mountains frame the horizon. The Kidepo River, dry for much of the year, carves a sandy bed through the park. Borassus palms stand sentinel over watering holes. You’re not just seeing a park. You’re witnessing a geography that has remained unchanged for millennia. The Wildlife: Density Without Crowds Kidepo’s wildlife densities rival the best parks in East Africa—but you’ll have them to yourself. Lions: Prides of 15-20 individuals, often seen on the Narus Valley floor Leopards: Present, though elusive (as they should be) Cheetahs: One of the only places in Uganda where you might see them Elephants: Large herds, especially in dry season Buffalo: Thousands, darkening the plains Zebras: Endless herds, often with Grevy’s zebra (rare elsewhere) Giraffes: The Rothschild’s variety, elegant against acacia Ostriches: Africa’s largest bird, striding across savanna And the birds—over 475 species, including the ostrich, the Karamoja apalis (found nowhere else), and vultures circling thermal lifts. The Solitude: The Last Quiet Place In peak season at Queen Elizabeth, you might share a lion sighting with 10 other vehicles. In Kidepo, you might be the only vehicle in the entire park. Not hyperbole. Actual reality. I’ve sat with a lion pride for two hours—the only vehicle. I’ve watched elephants drink at a waterhole with no one else present. I’ve listened to the silence and heard only wind. This is increasingly rare. This is what Kidepo protects. The People: Karamojong Warriors The Karamojong people have lived alongside this wildlife for centuries—not as poachers, but as pastoralists who understand the land. Their manyattas (homesteads) dot the park’s edges. Their young men, still carrying spears, walk alongside cattle as their fathers did. A visit to a Karamojong village isn’t a tourist performance—it’s an encounter with a culture that has resisted modernity while adapting to it. You’ll see dances that predate colonialism. You’ll hear stories of warriors and lions. You’ll understand that humans and wildlife can coexist, have coexisted, here for generations. The Challenge – What Makes Kidepo Difficult to Reach Gist: I won’t sugarcoat it: Kidepo is hard to reach. That’s why it’s still wild. Here’s exactly what you’re signing up for. Distance and Drive Times Route Driving Time Road Conditions Kampala to Gulu 5-6 hours Good tarmac Gulu to Kitgum 2 hours Good tarmac Kitgum to Kidepo 3-4 hours Rough, corrugated, dusty TOTAL 10-12 hours Long day or 2 days with stop The Road Itself The last stretch from Kitgum to Kidepo is the real test. Corrugated roads shake every bolt in the vehicle. Dust penetrates everything—your bags, your camera, your lungs. You’ll cross seasonal riverbeds. You’ll pass through villages where children wave and cattle block the road. It’s not dangerous. It’s not impossible. But it’s real. And by the time you arrive, you’ll feel like you’ve earned the park. Infrastructure Limitations Fuel: None in the park. Must carry enough or fill in Kitgum. Supplies: Limited. Stock up before
Queen Elizabeth vs. Murchison Falls: Which National Park Delivers Better Wildlife Photography Opportunities in 2026?
By Charles Lubega | Senior Wildlife Photography Guide, Travel Giants Uganda5 Years Leading Photo Safaris | 100+ Photography Expeditions | Canon Ambassador (East Africa)* The Explicit Answer: Your Photographer’s Decision Choose Queen Elizabeth if you prioritize hippo and elephant photography from water, tree-climbing lions in fig trees, and the highest density of wildlife along the Kazinga Channel. Choose Murchison Falls if you want the dramatic waterfall backdrop, rhino tracking at Ziwa, giraffes in abundance, and the classic African savanna aesthetic with the Nile as your constant companion. Quick Facts Comparison Factor Queen Elizabeth Murchison Falls Size 1,978 sq km 3,893 sq km Mammal Species 95 76 Bird Species 600+ 450+ Signature Feature Kazinga Channel (hippo capital) Victoria Nile (waterfall backdrop) Unique Advantage Tree-climbing lions Ziwa rhino add-on Landscape Volcanic craters, savanna, channel Falls, Nile, savanna, riverine forest Best Season Dry (June-Sept, Dec-Feb) Any season (water always present) Both parks deliver world-class wildlife photography, but they serve different photographic visions. This guide will help you match your photographic priorities—whether you crave water-level hippo shots, lions in fig trees, the iconic waterfall frame, or golden savanna light—to the right park. *I’ve led over 100 photography-focused safaris through both parks. I’ve watched photographers cry from joy and frustration. I know exactly where to position the vehicle at 6:17 AM for golden hour light on elephants, which termite mounds leopards favor for dawn appearances, and how the angle of light transforms the Kazinga Channel versus the Nile Delta. Let me guide you to the right choice.* Quick Answer – Which Park Should a Photographer Choose? Scan this table. You’ll find yourself in one column instantly. Choose Queen Elizabeth If… Choose Murchison Falls If… You want hippo photography (world’s highest concentration) You want the waterfall as a dramatic backdrop Tree-climbing lions in fig trees are your priority Giraffes in classic savanna settings are your goal You prefer water-level wildlife (boat safari photography) You want vast landscapes with the Nile River You seek volcanic landscape diversity You want to add rhinos at Ziwa Sanctuary You want the highest density of birds (600+ species) You prefer fewer tourists, more solitude You’re photographing in dry season (animals concentrated) You’re photographing any season (water always present) You want elephants against savanna with mountains You want elephants against river with waterfall Where did you land? Queen Elizabeth or Murchison Falls? Keep that in mind as we go deeper. But stay open—sometimes the park that chooses you is the one you hadn’t considered. The Photographer’s Perspective – What Makes a Park “Good” for Photography? *Gist: Before we compare, let’s agree on what photographers actually need: light quality, animal density, behavioral opportunities, compositional variety, and accessibility. Here’s how I evaluate parks after 100+ photo safaris.* The Five Photographic Factors Factor Why It Matters Light Quality Golden hour duration, angle of sun relative to landscapes, cloud cover patterns Animal Density How many subjects per square kilometer, predictability of sightings Behavioral Opportunities Action shots (hunting, playing, fighting), unique behaviors Compositional Variety Backgrounds, foregrounds, water elements, tree structures Accessibility Can you get close? Vehicle positioning restrictions? Boat platforms? Personal credibility marker: I’ve led photography workshops in both parks for 8 years. I’ve watched photographers cry from joy and frustration. I know exactly which park delivers which shot. Queen Elizabeth National Park – The Photographer’s Breakdown Gist: Queen Elizabeth is Uganda’s most biodiverse park—and for photographers, that means endless variety. But variety isn’t the same as consistency. Here’s exactly what you’ll find. The Kazinga Channel (Water-Level Gold) What you’ll photograph: Hippos (hundreds, sometimes thousands), elephants drinking and bathing, buffalo along shores, crocodiles basking, incredible birdlife. Best time: 11:00 AM – 2:00 PM (harsh light but animals active; bring polarizer) Photographic advantages: Eye-level with animals from boat, intimate portraits, reflection shots. Gear recommendation: 70-200mm for hippos, 100-400mm for birds, polarizer for water glare. The shot everyone wants: Elephant trunk reaching for water with hippos yawning in background. Kasenyi Plains (Predator Territory) What you’ll photograph: Lions (60% sighting probability), leopards (20%, requires luck), Uganda kob, hyenas, jackals. Best time: 6:30 AM – 9:00 AM (golden hour, predators returning from night hunt) Photographic advantages: Open plains mean long visibility, termite mounds as compositional elements. Gear recommendation: 100-400mm or 150-600mm for lions, 70-200mm for kob herds. The shot everyone wants: Lion walking toward camera with morning light, termite mound behind. Ishasha Sector (Tree-Climbing Lions) What you’ll photograph: Lions draped in fig tree branches—a phenomenon found only here and Tanzania. Best time: Afternoon (lions often rest in trees 3:00 PM – 6:00 PM) Photographic advantages: Unique behavior, compositional possibilities with tree frames. Gear recommendation: 70-200mm for tree shots, 100-400mm for ground shots. The shot everyone wants: Lioness with cubs in fig tree, golden afternoon light filtering through leaves. Volcanic Landscapes What you’ll photograph: Explosion craters, panoramic views, dramatic skies. Best time: Late afternoon for shadows defining crater rims. Photographic advantages: Landscape variety beyond wildlife, context shots for storytelling. The Honest Photographic Truth “Queen Elizabeth gives you variety and density. You’ll never run out of subjects. But animals are spread across different sectors—you’ll drive between them. The Kazinga Channel is the reliable superstar. If you only have one day, spend it on the boat.” Murchison Falls National Park – The Photographer’s Breakdown Gist: Murchison Falls is Uganda’s largest park—and for photographers, it offers scale, drama, and the iconic waterfall shot. But the real magic is the Nile as your constant companion. The Victoria Nile (Waterfall Drama) What you’ll photograph: The Nile squeezing through a 7-meter gap and plunging 43 meters—the world’s most powerful waterfall. Best time: Morning for light on the falls (east-facing), afternoon for rainbows. Photographic advantages: The falls themselves are the subject; wildlife in foreground adds scale. Gear recommendation: 24-70mm for wide shots of falls, 70-200mm for compressed compositions with animals. The shot everyone wants: Elephant or giraffe with waterfall in background—the classic Murchison frame. Murchison Falls’ signature shot: wildlife with the world’s most powerful waterfall as backdrop. Northern Bank (Classic Savanna) What you’ll photograph: Giraffes (abundant), elephants, buffalo, lions, leopards, hyenas, antelopes. Best time: 6:30 AM – 10:00 AM and 4:00 PM – 6:30 PM. Photographic advantages: Open savanna with acacia trees,
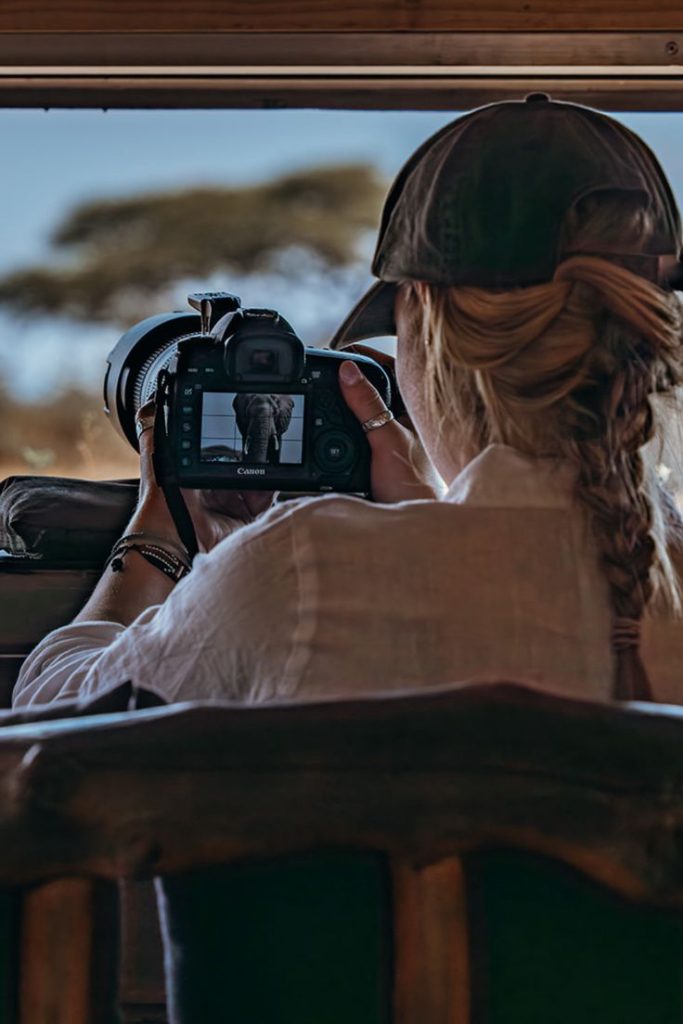
Recommended Camera Gear for a Photography Safari Trip
By Charles Lubega | Senior Wildlife Photographer & Safari Guide, Travel Giants Uganda 15 Years Photographing Uganda’s Wildlife | Canon Ambassador | Photography Workshop Leader The Explicit Answer: What You’ll Learn in This Guide I’ve watched photographers step off safari vehicles with tears in their eyes—not because of what they saw, but because of what they missed. A lioness with cubs, backlit at golden hour, blurred because their lens wasn’t fast enough. A leopard in a tree, too far away, just a speck in the frame. A gorilla reaching for fruit—missed because their battery died. After 15 years of photographing Uganda’s wildlife—from the lions of Queen Elizabeth to the gorillas of Bwindi, from the elephants of Murchison to the chimpanzees of Kibale—I’ve learned that the right gear doesn’t guarantee the shot. But the wrong gear guarantees you’ll miss it. This guide delivers honest, field-tested recommendations for camera gear on a Uganda safari. Not sponsored opinions, not theoretical specs—real advice from someone who’s shot in every park, in every condition, with every type of gear. You’ll learn what you actually need, what you can skip, and exactly how to prepare for the shots you’ve dreamed of. Quick Overview Topic What You’ll Learn Camera Bodies Full-frame vs. crop, key features, recommendations Lenses The holy trinity, budget alternatives, why zooms beat primes Support Gear Bean bags, tripods, monopods—what actually works Accessories Batteries, cards, cleaning kits—the small things that save shots Rent vs. Buy What makes sense for your situation Packing How to carry it all (without checking your gear) The deeper truth: The best camera is the one you have with you. But on safari, having the right one makes all the difference. I’ve tested every lens mentioned here in the field—in dust, rain, and golden hour light. I’ve made every gear mistake a photographer can make, so you don’t have to. Let me help you come home with the shots you dreamed of. [IMAGE PLACEMENT 1: Hero shot of photographer with telephoto lens in safari vehicle, golden light, wildlife visible in distance. Caption: “The right gear doesn’t guarantee the shot—but the wrong gear guarantees you’ll miss it.”] The Philosophy – Gear Matters, But Not How You Think Gist: Before we dive into specific recommendations, you need to understand what gear actually does—and doesn’t—do for your safari photography. What Gear Can Do Let you shoot in low light (dawn, dusk, forest) Reach distant subjects (lions, leopards, birds) Freeze action (running cheetahs, flying birds) Survive dust, rain, and bumps What Gear Can’t Do Guarantee a good composition Replace patience and field craft Fix bad light or bad timing The Honest Truth: A pro with an entry-level camera will get better shots than a beginner with a $10,000 setup. But that same pro with the right gear will get shots the beginner can’t even attempt. Gear is a tool, not a magic wand. Choose wisely, but don’t obsess. Camera Bodies – What Actually Matters for Safari Gist: Your camera body is the engine. Here’s what to look for—and what you can ignore. Full-Frame vs. Crop Sensor Factor Full-Frame Crop Sensor Low-light performance Excellent Good Reach (crop factor) Standard 1.5x-1.6x extra reach Weight Heavier Lighter Cost Higher Lower Best for Low light, wide angles Budget, extra reach The Verdict: Both work. Full-frame gives you better low-light performance (critical for dawn/dusk and forest). Crop sensors give you extra reach (a 400mm lens becomes 600mm equivalent). Choose based on your priorities. Key Features for Safari Feature Why It Matters Fast autofocus Animals move. You need to keep up. High burst rate 8-10+ fps for action sequences Weather sealing Dust and rain are guaranteed Good high-ISO performance Dawn, dusk, forest light Dual card slots Backup is non-negotiable Recommended Camera Bodies (2026) Level Crop Sensor Full-Frame Entry Canon EOS R10, Nikon Z50, Sony A6400 — Mid-range Canon EOS R7, Fujifilm X-T5, Sony A6700 Canon EOS R6 II, Nikon Z6 III, Sony A7 IV Pro — Canon EOS R3, Nikon Z8/Z9, Sony A1 [IMAGE PLACEMENT 2: Side-by-side comparison photo: full-frame camera vs. crop sensor camera, with size difference visible. Caption: “Full-frame vs. crop: both work, but for different reasons.”] Insider Tip Don’t buy a new body right before your trip. Practice with it. Know where the buttons are. The bush is not the place to learn your camera. Lenses – The Heart of Your Safari Kit Gist: Your lens choices will make or break your safari photography. Here’s the truth about what you need. The Reality of Wildlife Distance On safari, animals are rarely close. Lions at 20-30 meters. Leopards at 50 meters. Birds at 30-100 meters. You need reach. The “Holy Trinity” of Safari Lenses Lens Why You Need It Best For 100-400mm or 150-600mm Primary wildlife lens Lions, leopards, elephants, birds 70-200mm f/2.8 Medium reach, low light Portraits, closer animals, low-light 24-70mm Wide-angle Landscapes, camp scenes, context shots Budget Alternatives If You Can’t Afford… Consider… Canon/Nikon/Sony 100-400mm Tamron/Sigma 150-600mm (excellent value) 70-200mm f/2.8 70-200mm f/4 (lighter, cheaper, still good) 24-70mm f/2.8 24-105mm f/4 (more range, less light) Prime Lenses? (Probably Not) Prime lenses (fixed focal length) are sharper and faster, but on safari, you need flexibility. A zoom lets you frame without moving the vehicle. Stick with zooms. [IMAGE PLACEMENT 3: Three lenses laid out: 24-70mm, 70-200mm, 100-400mm (or similar), showing size progression. Caption: “The holy trinity of safari lenses—wide, medium, long.”] Insider Tip If you can only bring one lens, make it a 100-400mm or 150-600mm. You’ll miss some landscape shots, but you’ll get the wildlife. That’s why you’re here. Support Gear – Bean Bags Beat Tripods Gist: Tripods are useless in safari vehicles. Here’s what actually works. The Bean Bag: Your Best Friend Factor Why It Matters Stability Rest on vehicle window or door Flexibility Adjusts to any angle Weight Empty bag weighs nothing (fill at destination) Cost Cheap or DIY How to Use: Rest the lens on the bean bag, not the camera body. This stabilizes the lens, reduces shake. Monopod: Useful for Walking Safaris Good for gorilla trekking (where tripods impractical) Provides stability without weight of
